

Short answer: An SMD screen installation runs in six stages: site survey, steel structure, power and data cabling, wall mounting, controller setup and calibration, then testing and handover. Most problems that show up later, such as a wavy screen surface, tripping breakers or dead cabinets, start with a step that was rushed. This guide walks through each stage and what you should check.
Take a fixed indoor wall such as the Absen K V3 indoor video wall as an example. Its panels are 39.5 mm thick and the wall weighs about 25 kg per square metre. Even a light screen like this needs a level frame, a planned power supply and a clean cable route before the first panel goes up.
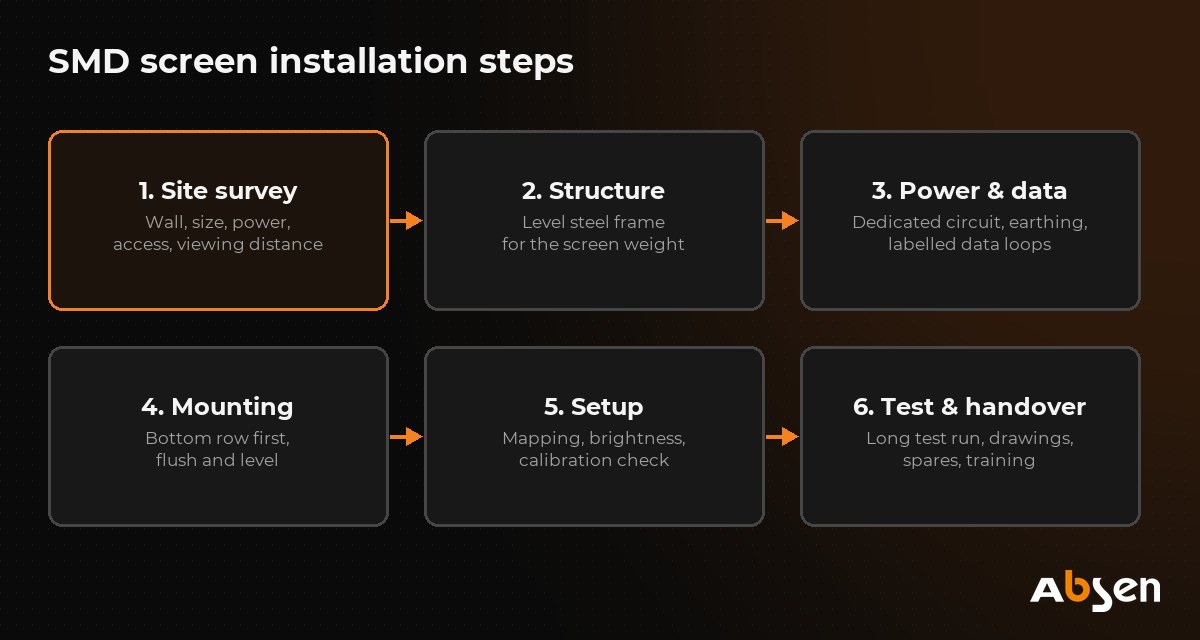
Step 1: What happens during the site survey?
The site survey decides almost everything else. An installer visits the location and checks:
- The wall or mounting point. Brick, concrete block, RCC or drywall. Drywall and false walls usually cannot carry a screen without extra steel.
- Exact size of the space. Width, height and any columns, beams, AC ducts or windows in the way.
- Viewing distance. This sets the pixel pitch. Our SMD Screen Size Guide shows how to work out size and resolution from distance.
- Power. Where the nearest distribution board is, its spare capacity, and whether there is proper earthing.
- Access. Can you reach the back of the screen later, or must all service happen from the front?
- Where the controller will sit. A rack, an AV room or a cabinet near the screen.
After the survey you should get a drawing with the screen size, cabinet layout, weight, structure type and power points. If you only get a price on WhatsApp, ask for the drawing before you pay an advance.
Step 2: What does a steel structure for an SMD screen need?
The structure carries the screen and keeps it flat. A screen that is out of level by a few millimetres shows visible seams and bright or dark lines where cabinets meet.
For an indoor wall, the structure is usually a frame of steel box sections fixed to the wall with anchor bolts. It should:
- Carry the full screen weight, with a safety margin. Ask for the weight per square metre on the datasheet.
- Be level and flat across the whole area before any cabinet goes on.
- Leave space behind the screen for cables and airflow.
- Be painted or galvanised so it does not rust.
Worked example (K V3): a wall 4 m wide and 2.25 m high is 9 m². At about 25 kg/m², the screen alone weighs about 225 kg. With 1000 × 250 mm panels, that is 4 panels across and 9 panels high, so 36 panels in total. The frame and fixings add more weight on top of this.
Outdoor screens are a different job. They face wind, rain and heat, so the structure needs engineering for wind load, drainage and sealed cable entries. Rooftop and roadside screens may also need permission from the local authority. Our outdoor LED billboard guide covers the structure and permit side in detail.
| Point | Indoor wall | Outdoor screen |
|---|---|---|
| Main load | Screen weight | Screen weight plus wind load |
| Typical structure | Steel frame bolted to wall | Engineered frame, rooftop frame or pole |
| Weather protection | Not needed | Drainage, sealed cable entries, rust protection |
| Approvals | Building owner or mall management | Often local authority, plus building owner |
| Service access | Front or rear, depending on model | Usually a rear walkway or front service |
Step 3: How should power and data cabling be planned?
Cabling is where cheap installations cut corners. Poor cabling causes tripping breakers, flickering cabinets and signal drops that are hard to trace later.
Power cabling:
- A dedicated circuit from the distribution board, with a breaker sized for the screen’s maximum power, not its average power.
- Power split into groups, so one group feeds a set number of cabinets. Do not daisy-chain more cabinets than the manufacturer allows on one power line.
- Proper earthing for the screen, the structure and the controller.
- Voltage protection. Pakistan’s mains supply is 230 V at 50 Hz, but swings and load shedding are common. Read how to protect a screen from load shedding and voltage swings for UPS and stabiliser sizing.
Data cabling:
- The controller sends the picture to the cabinets over network cable. Standard copper network cable works up to about 100 metres. For longer runs, installers use fibre.
- Cable each data loop in the order shown on the cabinet layout drawing, and label both ends.
- Keep data cables away from power cables where you can, and leave a spare run if the route is hard to reach later.
The SMD screen controller guide explains how the sending card, receiving cards and processor fit together.
Step 4: How are the cabinets mounted on the wall?
Wall mounting starts from the bottom row, or from a fixed reference line, and works upward.
- Mark a level reference line on the structure.
- Fix the first row of cabinets and check level and alignment.
- Add each row, locking cabinets together so their edges sit flush.
- Connect power and data to each cabinet as you go, following the layout drawing.
- Check the whole surface with a straight edge or laser. Fix any gaps or steps between cabinets now, not after handover.
Panel size affects how well the screen fits the wall. The K V3 comes in three panel widths (750, 1000 and 1250 mm) with the same 250 mm height, so the width can match a wall more closely. It can also wrap around a corner in an L shape. Wall mounting is one of several mounting options for this model.
Ask your installer whether the model is serviced from the front or the back. A screen mounted flat against a wall with no rear gap must be front-serviceable, or every repair will mean taking cabinets down.
Step 5: What happens in controller setup and calibration?
Once every cabinet is on the wall and connected, the screen is set up from the controller software.
- Screen mapping. The software is told how many cabinets there are and in what order, so the picture lands in the right place.
- Receiving card settings. Each card gets the correct settings for that cabinet model.
- Brightness and colour temperature. Set for the room. An indoor screen at full brightness in a shop or office is tiring to look at and uses more power.
- Calibration check. Branded cabinets leave the factory calibrated. On site, the installer checks that all cabinets match. Recalibration is only needed if some cabinets look different, for example after mixing panels from different batches.
- Input sources. Laptop, media player, set-top box or camera, plus scheduling if the screen plays content on its own.
Step 6: What should testing and handover include?
Do not accept a screen the same day it first switches on. Ask for a test run first.
Testing:
- Full-screen test patterns in red, green, blue, white and black. Look for dead pixels, dark modules and colour patches.
- A long run, ideally a full day or more, with normal content. Faults in power supplies and connections often show up after the screen warms up.
- A power cut test: switch off and on again, and check the screen comes back with the right settings.
- Camera check: film the screen with a phone to look for flicker or lines.
Handover pack:
| Item | Why it matters |
|---|---|
| As-built drawing and cabinet layout | Needed for any future repair or extension |
| Cabinet serial numbers | Needed for warranty claims |
| Controller software, logins and settings backup | So the screen can be restored after a fault |
| Spare modules and power supplies | Same batch as the screen, so colours match |
| Written warranty terms | Shows what is covered and for how long |
| Basic operator training | Switching on and off, changing content, simple checks |
Our SMD screen warranty guide explains what a written warranty should cover. For care after handover, see SMD screen maintenance.
How long does an SMD screen installation take?
It depends on the screen size, the structure and how ready the site is. A small indoor wall on a prepared frame takes much less time than a rooftop screen that needs an engineered structure and approvals. Steel fabrication and permits usually take longer than mounting the screen itself.
Ask your installer for a written schedule that shows each stage: survey, structure, cabling, mounting, setup and testing. In shops and malls, work is often done after closing hours, which adds days.
What are common SMD screen installation mistakes?
- Mounting on a frame that is not level, so seams show across the picture.
- Sizing the breaker for average power, so it trips at full white.
- No earthing, or earthing only on the structure and not the controller.
- Mixing panels from different batches without recalibration.
- No rear access and no front service, so a simple module swap becomes a big job.
- No labels on cables and no layout drawing at handover.
- Skipping the long test run, so faults appear after the installer has left.
Who can do the installation?
For a site survey and an installation plan, contact Irfan Corporation, the authorised Absen distributor in Pakistan. Visit the contact page or call 0331-5575501. New to SMD screens? Start with what is an SMD screen.
Frequently asked questions
Site survey, steel structure, power and data cabling, wall mounting, controller setup and calibration, and finally testing and handover. Each stage depends on the one before it.
Indoor screens are usually mounted on a steel frame that is bolted to the wall. The frame keeps the screen level and leaves room for cables. Drywall and false walls often need extra steel support.
Size the circuit for the screen’s maximum power, not its average power. Your installer should calculate this from the datasheet and the screen area, then split the load into groups.
It is a good idea where power cuts and voltage swings are common. At minimum, use a stabiliser or surge protection and a clean shutdown routine. A UPS also protects the controller from sudden power loss.
About 25 kg per square metre, with panels 39.5 mm thick. A 9 m² wall weighs about 225 kg before the frame is added.
An as-built drawing, cabinet serial numbers, controller settings backup, same-batch spare parts, written warranty terms and basic training for whoever runs the screen.
About this guide: Written by the Absen Pakistan team at Irfan Corporation, the authorised Absen distributor in Pakistan, with offices in Karachi and Islamabad. Product details come from Absen’s official specifications. Last updated: 26 October 2026.